Showing posts with label art. Show all posts

Thursday, 1 May 2014

Karijini National Park 2014

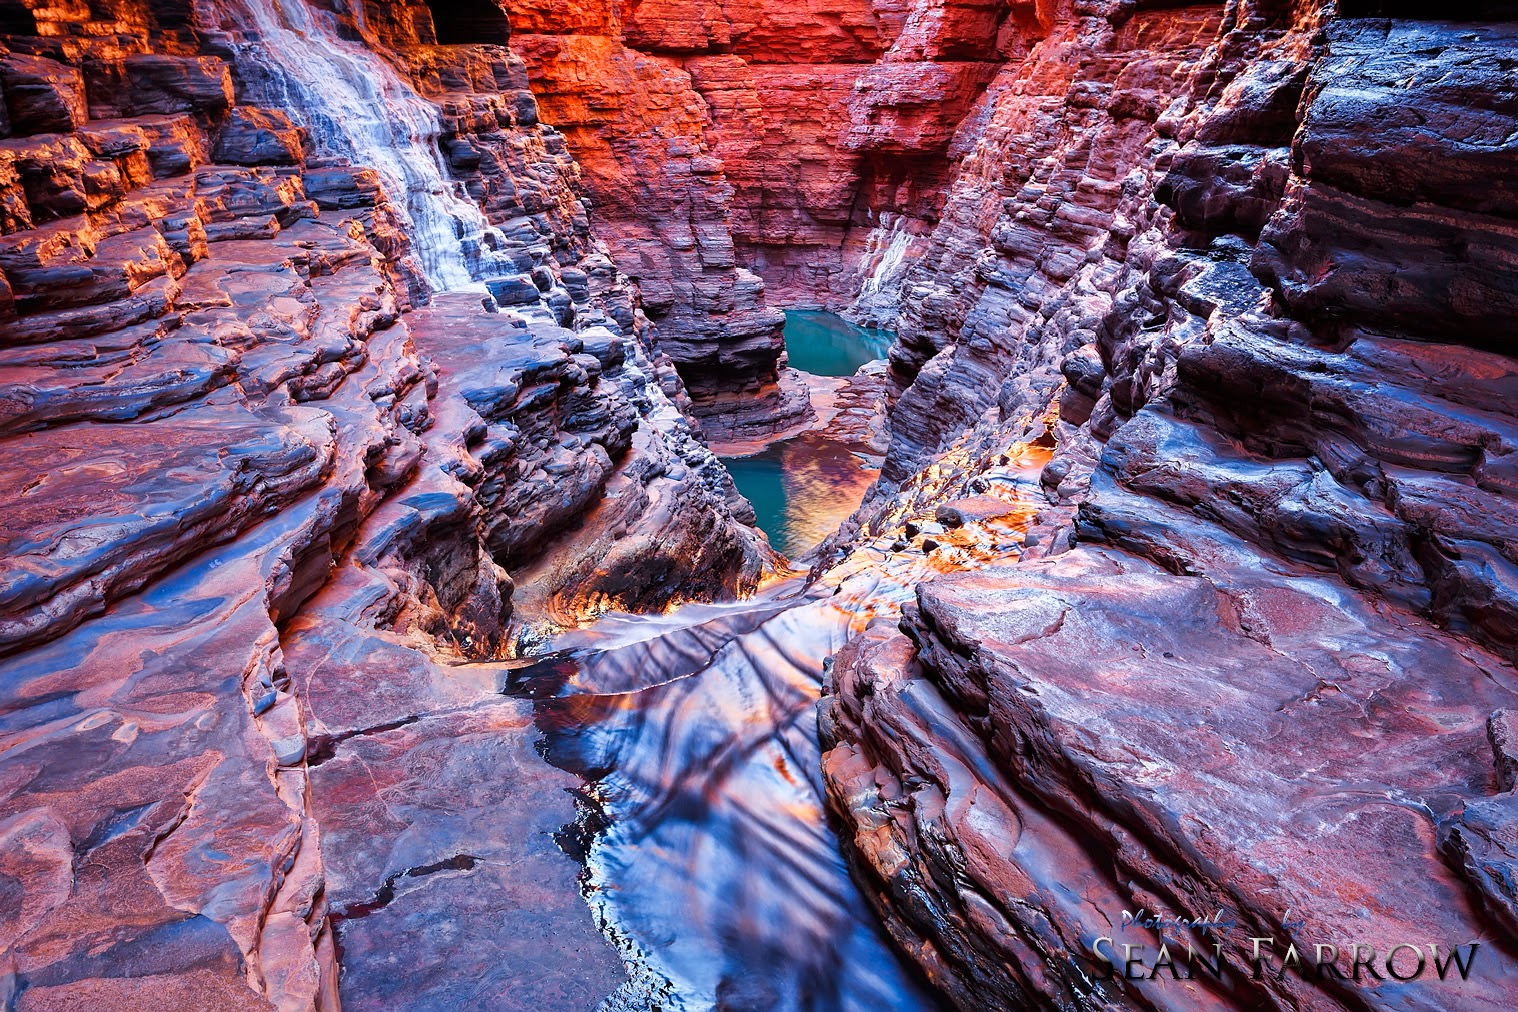
Kermits Pool, Hancock, Gorge


Hi everybody and welcome to the latest instalment of the Chronicles of Sean's Photography!

On the 9th of April I boarded a plane bound for Perth, Western Australia. This would be my first time visiting our Country's largest state, and my first professionally organised photography workshop, facilitated by Tom Putt of Inspire Landscapes. After an easy 3 hour flight I found my way to the gate to board my connecting flight to Paraburdoo, a small mining town in the remote Pilbara region of Western Australia, and the gateway to the spectacular Karijini National Park.

Karijini National Park is located in the remote Pilbara region of Western Australia. The area is characterised by the sweeping plains of red dust, the famous Hamersley Ranges and the deep river gorges carved out by millions of years of erosion, The Pilbara also hosts the oldest known exposed rock on earth, dated at a staggering 3.5 billion years old. So old in fact that no fossil records are found as life hadn’t progressed beyond algae and bacteria at this stage of earth’s infancy.

My first impression of Western Australia was a baking heat as I exited the plane onto the tarmac. There I met up with our tour organiser and master landscape photographer Tom Putt, who was joined for this week by the award winning photographer Paul Hoelen. I also met with the fantastic and talented group of people I'd be spending the next 5 days with.

On our drive from Paraburdoo to the awesomely equipped Karijini Eco Retreat, I found out my tent-buddy for the next few days was also named Sean. The normally 90-minute drive ended up taking a few hours as we continuously stopped to admire and photograph the landscape around us. As we all checked in and found our way to our fancy schmancy eco-tents, the excitement of being in such a spectacularly stark location was palpable. A massive bonus was finding out the menu at the retreat was full of all sorts of delicious options. So over dinner Tom and Paul led us through their safety briefing and filled us in on what the next few days would entail. Soon enough though, everyone was ready for bed, and a 4:30am start was waiting on the other side of sleep.

At 4:30am we were rudely awoken by our alarms as we grabbed our gear and made our way bleary-eyed  in the pitch black to the vehicles to shoot sunrise at our first location, Kalamina Gorge. After a short drive, we made our way through the darkness into the gorge, where we were met by subtle cascades and towering cliff faces bathed in the soft morning light. After shooting every angle we could find we made our way back to the retreat for breakfast and brief of our next location, Hamersley Gorge. Lunch was served and a quick editing session ensued in the heat of the day, we then headed out to our next shoot.

We soon split up into 2 groups, one winding up the gorge from the bottom, and us climbing down from the top over slippery ancient slate. In the middle was a beautiful rock pool large enough to swim freely, so that's what we did! Soon we had our first encounter with what we'd dub "The Bikini Brigade", young tourists from all around the world enjoying the stunning surrounds. We all took turns photographing a spot called "Spa Pool", and exploring the abstract surroundings we'd found ourselves in. As we made our way back for dinner we stopped at a spot overlooking the expanse of the Hamersley Ranges and  lined up our tripods and fired off shot after shot of the sunset.

The next day after breakfast and a quick sunrise shoot, we again split up and half of us ventured into the famous Hancock Gorge while the other half began their hike in the equally stunning Weano Gorge. Paul was leading us during the hike into the gorge to visit the beautiful "Spider Walk" and "Kermits Pool". We made our way into the chasm and began a trying free-climb around a rock embankment to a location called "The Amphitheatre". After shooting there for a short while we made our way down the slippery spider walk, which meant walking with your hands and feet pressed precariously into the dry rock sides of the gorge, while water cascaded down the rocks between your legs. Stepping on the wet rock felt like walking on the ice I'd encountered in the Arctic 4 months earlier, so caution was the name of the game. After a few meters the gorge opened up and we spied Kermits Pool, a stunning turquoise rock pool with flowing cascades and towering walls. To say we photographed this location to death would be an understatement. After another swim and testing our dry-bagged equipment by floating our camera bags through the water during our return, during which I made a wrong turn and had to climb and hike out of the gorge along a rougher route, we headed off for lunch and to shoot the sunset and numerous amazing native fig trees at Dales Gorge.

The following day we started with another sunrise shoot around the retreat, taking in the soft light. After breakfast we made our way into Weano Gorge. Weano included much more swimming with our dry-bagged camera equipment floating along ahead of us. Tom had given us the challenge to photograph a particular spot by 10am, where the light literally glows on the iron oxide rocks... challenge accepted, and completed. Weano Gorge is also the home of "Handrail Pool", a spectacular expanse of water accessible by climbing down and wet and slippery rock slope with the help of a handrail attached to the edge of the walls. After lunch and another quick editing and q&a session, we made our way out to the visitors centre for some education about the history of the park, and then on to Oxer Lookout. This location overlooks a location called "Junction Pool", and the vertical vista is absolutely stunning. At the junction, Hancock Gorge, Red Gorge, Joffre Gorge and Weano Gorge meet over 100 meters (300ft) below the lookout. It was a particularly difficult location to shoot as the difference in light between the top and bottom of the lookout was quite wide. We made our way back to a nearby picnic location for an awesome BBQ dinner prepared by Sean and Tom (and his pink feather boa), and a couple of wonderful image presentations by both Tom and Paul.

Another early start and Tom took us out to Knox Gorge lookout for sunrise as Paul took another group back into Hancock Gorge for a 2nd shoot. The sun slowly rose, bathing the scenes before us in a soft, warm light. After the sun had risen we explored and photographed a burned out section of land, amazed at natures restorative powers. We then returned for our final Karijini breakfast, and to pack up our eco-tents and meet in the common area for some more photo processing and a critique/q&a session. Tom asked us to quickly process 5 of our favourite shots from the trip, which were then viewed on a large projector screen, and comments and constructive points were made about everyone's shots, including Tom's and Paul's. Once the session was complete, we all enjoyed some ice cream (we'd cleaned out the retreats supply over previous days) and headed back into Paraburdoo for our departure flight... with an impromptu photo shoot along the way! At both Paraburdoo and Perth, we said our farewells and headed on our way.

All in all it was a thoroughly enjoyable, educational and exhausting workshop. Both Tom and Paul were warm and welcoming, funny, knowledgeable and took the time to work with each participant in depth. I'd highly recommend Inspire Landscapes workshops for landscape photographers of any level, and finance provided, I'd be on another one *cough*Iceland*cough* in a heartbeat! I personally came away with a different understanding of taking time to explore my surroundings, and a mountain of wonderful photographs!

Prints from Karijini will be made available at www.seanfarrow.com.au over the next few weeks!

Until next time...

Pilbara Sunset
Kalamina Gorge
Liquid Light, Hancock Gorge
Behind Kermits Pool, Hancock Gorge

Spa Pool, Hamersley Gorge

Oxer Lookout


Rock Detail, Hamersley Gorge


"Get there by 10am..." Weano Gorge
Fig Tree Roots, Dales Gorge

That Tree


Tom and Sean
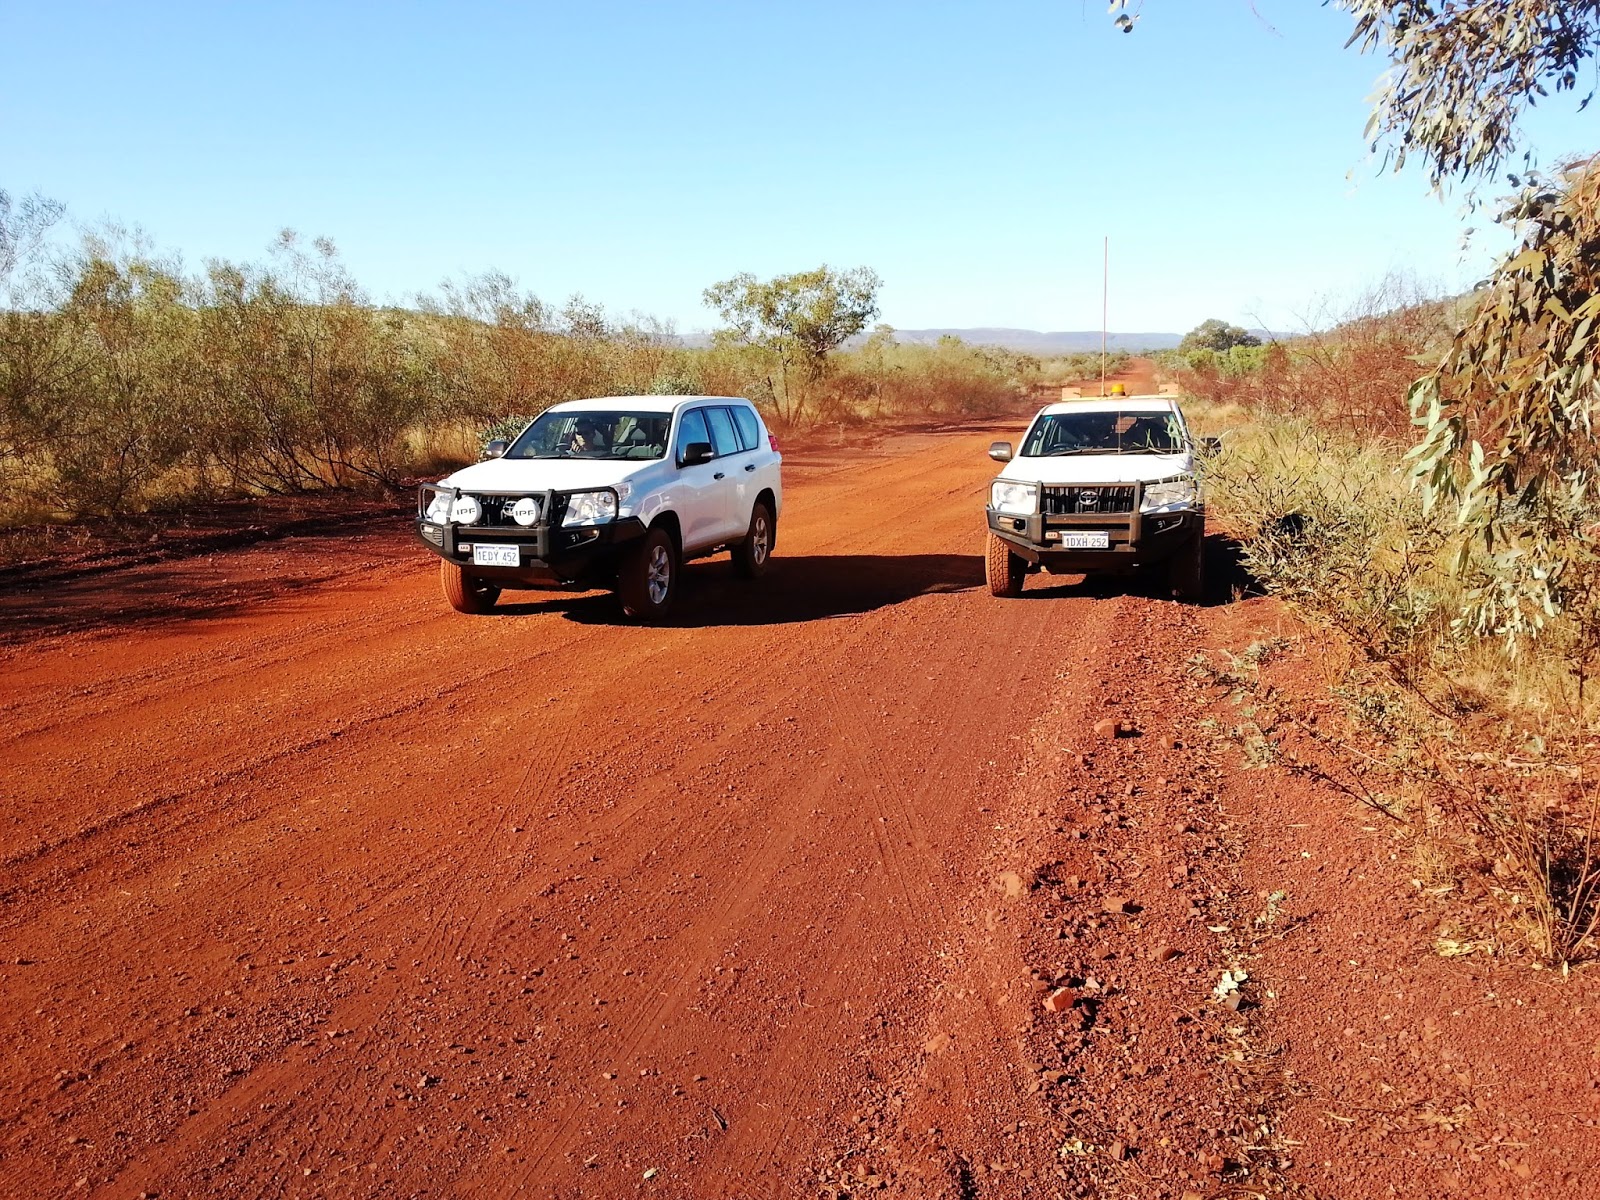
Mine-spec vehicles on the road.

Paul... always shooting! Paraburdoo Airport.


Sunday, 23 February 2014

Photoshop... photographic tool? Absolutely!

"Pimakka" - Levi, Finland.
This shot is a 180-degree 6x "portrait" photograph stitched panorama. I used this method to capture a high-resolution image of this wide scene for enlargement, and would simply be impossible to execute on film or without photoshop.
 
 
Hello again everyone!

Today I'm going to touch on the oft-debated subject of post processing work in fine-art photography.
We all hear the word "Photoshop" bandied about, and quite often it's used as a derogatory term, to insult someone or put a photographs merits down.

There seems to be this idea among some people out there that any photograph that is displayed, printed, shown in a gallery, shown on facebook, instagram, twitter, shot on a camera or even considered as a possible shot, should be completely unaltered from capture to print. That's all well and good. Where this idea came from and why the term "photoshop" is used in a negative sense though, is quite beyond me. You'll often hear "That's been photoshopped" as someone views another person's work. The simple matter is, that almost all photographs created at least in the last 7-10 years have been touched with photoshop at some point in it's progression from capture to display. Film is drum scanned into a high resolution file and tweaked in photoshop or lightroom, digital SLRs and medium format digital cameras capture images in a RAW format, that in 99.9% of cases is imported into Adobe Camera RAW, a plugin of... you guessed it, Photoshop! Despite how much people seem to despise it, photoshop touches almost every shot you see on a daily basis, no matter how marginally.

So that brings us to the point of the argument. How much post processing work is too much? Should the photographer try and replicate the scene they saw before them, try and replicate the scene they envision, or leave the image "as-shot" in camera? The answer is up to the photographer and how they want to display their vision! Photo documenters such as news photographers and wedding shooters may choose to do very little processing work to keep a raw, unedited look, whereas landscape, architectural and art photographers may work as much or as little as they need to bring THEIR vision to life in print or on the screen. The final decision is up to the photographer.

Fujifilm literally changed the way we view landscape photography in the 1990s when it introduced Velvia, a highly-saturated and very "contrasty" transparency film, which is possibly the most popular film for landscape shooters still in use today. Does velvia 50 look like reality as your eyes see it? Absolutely NOT! It makes landscapes just look better. So much so that all of us who shoot landscapes digitally chase the ideal blend of tones and contrast to get the velvia look a lot of the time. Why? Because it just looks great! If used inside it's physical limits it represents an idealized vision of a scene, just as tweaking a shot using levels and vibrance/saturation might do in photoshop.

So why do we all shoot in a RAW format from our digital cameras? RAW formats give us an uncompressed (and uncompromised) version of our original shot. We can adjust the exposure (within reason), white balance, contrast, colour vibrance and a myriad of other subtle adjustments without damaging the original file, or introducing unwanted elements into the shot. Invariably if you were to show someone who isn't schooled in photographic post processing work the RAW image straight from camera, 90% of the time they'd say "YUK! That's so flat... where's the colour?" RAW files capture huge amounts of detail and dynamic range, most of which isn't visible in the original capture, but the data is there in the file. This takes a certain amount of "massaging" to bring it to it's full potential, especially when working on photos captured in particularly trying lighting conditions, such as sunset or sunrise. How much or little that is is up to the photographer.

I personally like to bring a realistic view of what I saw before me to my limited edition photographs. This may involve a little post work, but generally not as much as people would think. I have developed methods of shooting a scene to get it close to right in camera, then just tweak the rough edges afterwards.

At the end of the day, love it or hate it, post processing has been around long before digital, and will stay around long after we're all gone. Film shooters used to use view cameras to bring things into sharp focus, they'd dodge and burn during printing to increase contrast and exposure compensation, they'd cross-process films in strange chemical combinations to bring out colour detail... and now, we drum scan and shoot raw, use graduated filters and bring details out using software as a tool, not as a crutch. We use the tools available to us.

Do you think Ansel Adams would shoot medium-format digital and use photoshop to process his shots if he were still with us? You bet he would! It's time to stop thinking of photoshop as "the P-word"... a swear word. It's a simple fact of photographic life in the digital age.

Have a great week everyone.

Sunday, 15 December 2013

Screen Calibration... more important that you think!

Hi again readers!

Two blog posts in two weeks... something must be wrong at Sean Farrow | photography HQ...

I'm going to dedicate this blog post to a subject that many aspiring photographers seem to gloss over. One that is of incredible importance when it comes to your own post-processing work. That subject is Screen Calibration.

Have you ever worked on a shot, made it look spectacular and full of colour and life, only to have a large and expensive enlargement made for yourself or even worse, a client, and had the print come back dark, underexposed and lacking that pop you had on your screen? I know I have... and most of you out there will have too. It's quite disappointing and can make you question your technique.

I also see loads of uploads on social media and photo sharing websites from amateur and hobby photographers that are chronically underexposed and have weird colour shifts, especially prevalent in longer shutter speeds where exposure value and luminance become critical. To be fair, the photographers themselves can see no issue with the way the image looks, and it, in most cases, will look spectacular on that screen, but the issue is the screen, not the image it's self.

This phenomena can be attributed to a whole host of factors, most of which we don't need to discuss in this article, but the one factor that I personally think is more important than any is Screen or Monitor Calibration.

In short, this is the process of setting your screen up in such a way that the colours, contrast and gamma settings accurately represent the image from the screen to the end print. There is numerous ways to achieve this, some better than others, but I HIGHLY suggest purchasing yourself a good quality monitor and a calibration kit. Monitors to look out for are anything that uses an IPS (In-Plane Switching) panel. Some companies will be charging an absolute premium price for something that is essentially the same as something half it's price, simply because they market it as a "Photography" monitor, so do your homework.

Then you'll have the companies that advertise (and the people who buy will argue) that their monitor ships to you "Pre-Calibrated"... right... pre-calibrated to what? Like a Dave Chappelle stand-up gig, this cracks me up every time! This might get you in the ballpark, but you're not in the game yet. The lighting and conditions in your workspace are unique to your workspace. This is where dedicated calibration hardware comes into play.

There's a whole host of monitor calibrators out there, and they basically do two main things: 1. They are placed directly on your monitor and sample colour, brightness and gamma readings to create and optimized profile for your equipment, and 2. They can monitor ambient light levels and adjust brightness and contrast accordingly. Some will argue that the 2nd point isn't really needed. I personally find it absolutely essential. It's down to personal preference at the end of the day. The main manufacturers of this equipment are Datacolor with their "Spyder" range, and Pantone with their less costly "Huey" range. I've used both, and can notice little, if any, difference in profiles between the two. I personally use the Huey system and get nothing short of spectacular results every single time! I've not been asked to endorse, and have not received any compensation from either of these companies. This is just my personal findings and opinions.

Once you've installed and calibrated your gear (I won't go into this here, but it's very simple), you'll notice your screen is probably not as bright, or as saturated in the red tones as it once was. This is a GOOD THING. You're screen is now much closer to the values you'll see in your prints, as long as you're soft-proofing with appropriate profiles as you should be, and converting to printer profiles during saving, but that's a subject for a whole other blog entry.

Good luck with all your own calibration and subsequent post processing. I have a feeling you'll find your workflow will be much more consistent from proof to print.

Sean.

www.seanfarrow.com.au

Wednesday, 22 June 2011

Welcome to the official Sean Farrow | photography blog!

Hi all,

I decided recently to start a blog to post my stories and experiences as a landscape photographer in Melbourne, Australia.

I'll post news, updates and tips here as often as possible, so check back often.

Don't forget to check out my website www.seanfarrowphotography.com.au/facebook page at www.facebook.com/pages/Sean-Farrow-photography/109301905770982, and my online landscape portfolio and web store at www.redbubble.com/people/fazz1977.

See you all soon!!!